How to Create GIFs from the Command Line on Linux
- Last updated: Dec 20, 2025
Introduction
While countless GIFs are readily available online, finding one that fits your exact needs can be frustrating—many are low quality or lack the right content. This comprehensive tutorial will teach you how to create high-quality GIFs yourself using the command line on GNU/Linux. You’ll use powerful tools like ImageMagick and FFmpeg to gain full control over your creations.
Installing the Tools
To get started, you’ll need to install two essential packages: ImageMagick and FFmpeg. These tools handle image conversion and video processing, respectively.
- Example for a Debian-based system:
root@host:~# apt install imagemagick ffmpegMake a GIF
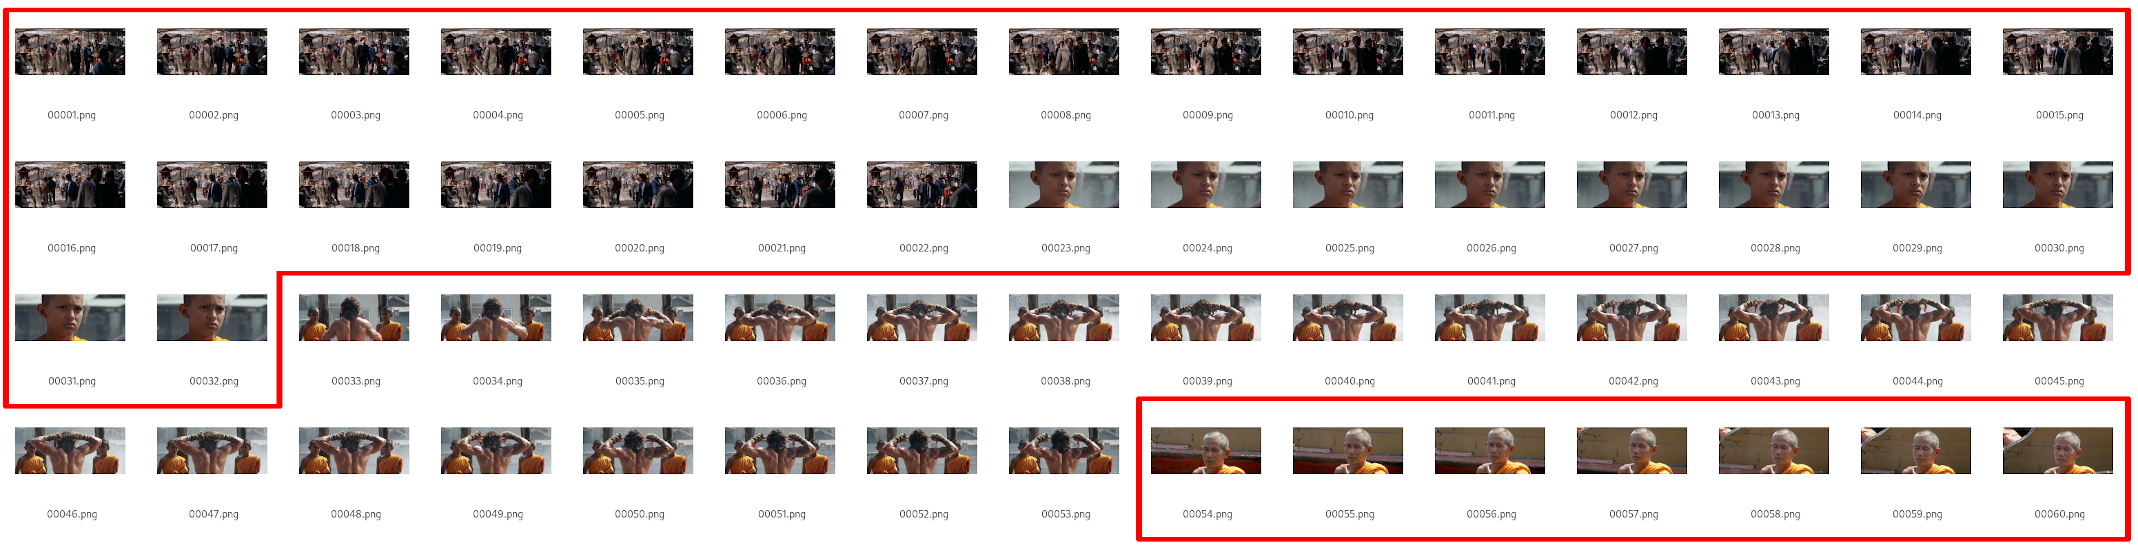
Extracting Video Frames
Begin by extracting individual frames from your video using FFmpeg. The following parameters define the output:
- Frame rate: 10 frames per second
- Scale: 320 pixels wide (height is auto-adjusted to preserve aspect ratio)
- Start time: 2 minutes and 14 seconds into the video
- Duration: 6 seconds
user@host:~$ ffmpeg -ss 2:14 -t 6 -i /movies/1988.Rambo.III.MULTI.x264.1080p.mkv -vf fps=10,scale=320:-1 $filename%05d.pngRemove Unwanted Frames
The frame extraction process may not be frame-perfect. That’s perfectly fine — simply delete any images you don’t want to include in the final GIF.
Convert PNG Files to a GIF
Once you're happy with the selected frames, use ImageMagick to convert them into a single looping GIF:
user@host:~$ magick -loop 0 *.png myimage.gifEnjoy the Result
Removing Black Bars
Some movies include black bars at the top and bottom of the video to preserve cinematic aspect ratios. These bars can be distracting in a GIF. Here's how to remove them.
Extracting Video Frames
Start by extracting the relevant frames from the video, just as before:
user@host:~$ ffmpeg -ss 8:26 -t 9 -i /movies/2000.American.Psycho.MULTI.AC3.1080p.x264.mkv -vf fps=10,scale=320:-1 $filename%05d.pngDetermine Image Dimensions
Use the identify command from ImageMagick to check the resolution and coordinates of your extracted frame:
user@host:~$ identify 00039.png
00039.png PNG 320x180 320x180+0+0 8-bit sRGB 79528B 0.000u 0:00.000- Based on the output dimensions, we can determine the appropriate crop area:
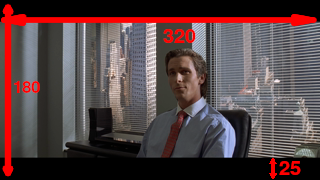
- Crop the frame to remove the black bars:
user@host:~$ magick 00039.png -crop 320x130+0+25 +repage Cropped_00039.png- After cropping, the result should look like this:
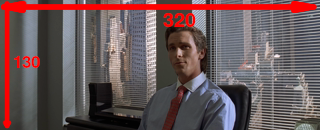
- To crop all frames using the same dimensions, run the following loop:
user@host:~$ for i in 000*; do magick "$i" -crop 320x130+0+25 +repage Cropped_"$i"; doneGenerate the Final GIF
user@host:~$ magick -loop 0 Cropped*.png myimage.gifEnjoy the Result

Adding Text to Your GIF
Extract Video Frames
Start by extracting frames from the video using FFmpeg, just like before:
user@host:~$ ffmpeg -ss 19:24 -t 5 -i /movies/1998.The.Big.Lebowski.MULTI.1080p.Bluray.x264.mkv -vf fps=10,scale=320:-1 $filename%05d.pngAdd Text to a Single Frame
Start by extracting frames from the video using FFmpeg, just like before:
-font: Font name (usemagick -list fontto view available options)-pointsize: Font size-gravity: Text alignment (e.g.,southfor bottom center)-annotate +0+0: Position offset (horizontal + vertical)
user@host:~$ magick 00016.png -font Cantarell-Extra-Bold -gravity south -pointsize 30 -stroke black -fill white -strokewidth 1 -annotate +0+0 'YOU'\''RE\nAN ASSHOLE!!!' Text_00016.png- Resulting frame with text overlay:

Add Text to Multiple Frames
To apply text across multiple frames, follow these steps:
- Step 1: Duplicate the original frames to avoid overwriting them:
user@host:~$ for i in 000*; do cp "$i" Text_"$i"; done- Step 2: Add the same text to a selection of frames (here from
00016.pngto00027.png):
user@host:~$ for i in 0001[6-9]*; do magick "$i" -font Cantarell-Extra-Bold -gravity south -pointsize 30 -stroke black -fill white -strokewidth 1 -annotate +0+0 'YOU'\''RE\nAN ASSHOLE!!!' Text_"$i"; doneuser@host:~$ for i in 0002[0-7]*; do magick "$i" -font Cantarell-Extra-Bold -gravity south -pointsize 30 -stroke black -fill white -strokewidth 1 -annotate +0+0 'YOU'\''RE\nAN ASSHOLE!!!' Text_"$i"; doneGenerate the Final GIF
Once all desired frames are labeled, create the animated GIF:
user@host:~$ magick -loop 0 Text_*.png myimage.gifEnjoy the Result

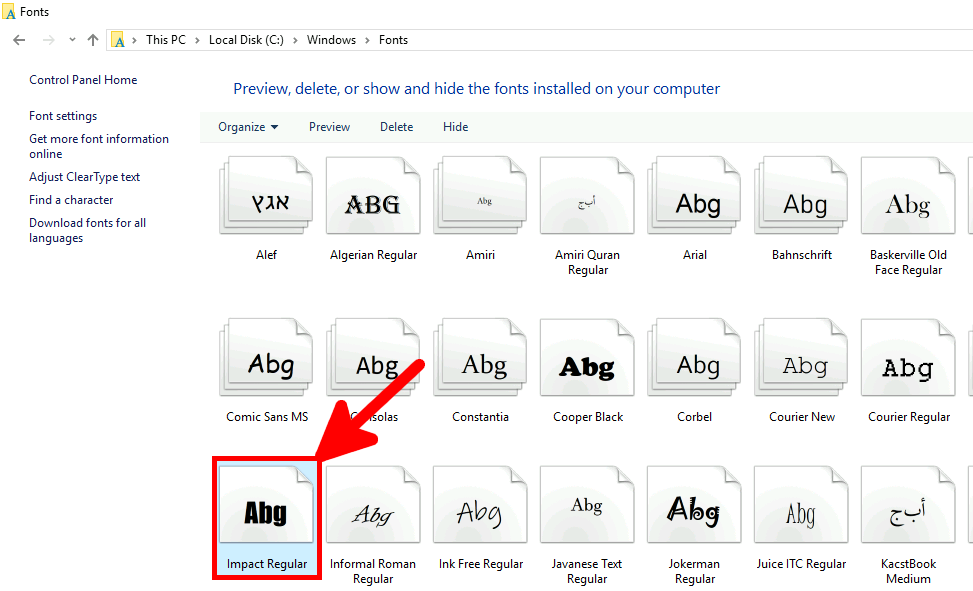
Using the Classic Impact Font
If you want your GIF captions to have the traditional meme style, you'll need to use the Impact font — widely recognized for its bold, uppercase look. This font isn't available by default on most GNU/Linux systems, but you can install it manually.
- On a Windows computer, locate the file
C:\Windows\Fonts\impact.ttfand copy it to your Linux machine:
- Step 1: Create a directory to store the Windows fonts:
root@host:~# mkdir /usr/share/fonts/WindowsFonts- Step 2: Copy the
impact.ttffile to the new folder:
root@host:~# mv impact.ttf /usr/share/fonts/WindowsFonts/- Step 3: Regenerate the fontconfig cache so your system can recognize the new font:
user@host:~$ fc-cache --force- Step 4: Extract a short video segment to test the font:
user@host:~$ ffmpeg -ss 10:48 -t 2 -i /movies/1997.Batman.and.Robin.MULTi.1080p.AC3.mkv -vf fps=10,scale=320:-1 $filename%05d.png- Duplicate the frames to a new set of files:
user@host:~$ for i in 000*; do cp "$i" Text_"$i"; done- Step 5: Apply text using the
-font Impactargument:
user@host:~$ for i in 0000[2-7]*; do magick "$i" -font Impact -gravity south -pointsize "55" -stroke black -fill white -strokewidth 1 -annotate +0+0 'FREEZE...' Text_"$i"; doneuser@host:~$ for i in 0001[0-4]*; do magick "$i" -font Impact -gravity south -pointsize "55" -stroke black -fill white -strokewidth 1 -annotate +0+0 'YOU'\''RE MAD!' Text_"$i"; doneuser@host:~$ magick -loop 0 Text_000* myimage.gifEnjoy the Result

Animating Text
Simulating Text Movement
To make your GIF more dynamic, you can animate text so that it moves across the frame. In this example, we slide the caption horizontally from left to center.
Step 1: Extract Video Frames
user@host:~$ ffmpeg -ss 16:43 -t 1 -i /movies/1993.groundhog.day.MULTI.1080p.bluray.x264.mkv -vf fps=10,scale=320:-1 $filename%05d.pngStep 2: Add Moving Text
We use a variable $a to control the horizontal position of the text. At each iteration, the value is increased to simulate motion:
$a: horizontal offseta=-250: initial position (off-screen left)((a+=60)): movement step (in pixels)
user@host:~$ a=-250;for i in 000*; do magick "$i" -font Cantarell-Extra-Bold -gravity south -pointsize 35 -stroke black -fill white -strokewidth 1 -annotate -"$a"+0 'I'\''M THINKING...' Texted_${i}; ((a+=60)); echo "$a"; doneAlternative Readable Version
a=-250
for i in 000*
do
	magick "$i" -font Cantarell-Extra-Bold -gravity south -pointsize 35 -stroke black -fill white -strokewidth 1 -annotate -"$a"+0 'I'\''M THINKING...' Texted_${i}
	a=$((a+60))
	echo "$a"
done
Step 3: Generate the Animated GIF
Once all the frames have the animated text applied, use ImageMagick to combine them into a looping GIF:
user@host:~$ magick -loop 0 Texted_*.png myimage.gifEnjoy the Result

Simulating Shaking Text
To add a dynamic, jittery effect, you can randomly vary the text position on each frame — simulating a shaking motion.
Step 1: Extract Video Frames
user@host:~$ ffmpeg -ss 45:02 -t 2 -i /movies/1995.ace.ventura.when.nature.calls.MULTI.1080p.x264.ac3.mkv -vf fps=10,scale=320:-1 $filename%05d.pngStep 2: Add Randomly Positioned Text
We use the $RANDOM variable in Bash to assign slightly different positions on each frame:
$posX: random horizontal offset (0–4 pixels)$posY: random vertical offset (0–14 pixels)
user@host:~$ for i in 000*; do posX=$RANDOM;let 'posX %= 5'; posY=$RANDOM;let 'posY %= 15'; magick "$i" -font Impact -gravity south -pointsize 40 -stroke black -fill white -strokewidth 1 -annotate +"$posX"+"$posY" 'WARRRMMM!' Texted_${i}; doneAlternative Readable Version
for i in 000*
do
	posX=$RANDOM
	let 'posX %= 5'
	posY=$RANDOM;
	let 'posY %= 15'
	magick "$i" -font Impact -gravity south -pointsize 40 -stroke black -fill white -strokewidth 1 -annotate +"$posX"+"$posY" 'WARRRMMM!' Texted_${i}
done
Step 3: Generate the Shaky GIF
user@host:~$ magick -loop 0 Texted_*.png myimage.gifEnjoy the Result
Simulating Text Zoom
To create a zoom-in effect on your caption, gradually increase the font size across each frame.
Step 1: Extract Video Frames
user@host:~$ ffmpeg -ss 4:09 -t 2 -i /movies/1991.Armour.of.God.2.1080p.x264.mkv -vf fps=10,scale=320:-1 $filename%05d.pngStep 2: Apply Zooming Text
We use a variable a to control the text size. It starts small and grows with each frame:
a=20: initial font size((a+=3)): increase size by 3 points per frame
user@host:~$ a=20; for i in 000*; do magick "$i" -font Impact -gravity south -pointsize "$a" -stroke black -fill white -strokewidth 1 -annotate +0+0 'OK!' Texted_${i}; ((a+=3)); doneAlternative Readable Version
a=20
for i in 000*
do
	magick "$i" -font Impact -gravity south -pointsize "$a" -stroke black -fill white -strokewidth 1 -annotate +0+0 'OK!' Texted_${i}
	((a+=3))
done
Step 3: Generate the Zoomed Text GIF
user@host:~$ magick -loop 0 Texted_*.png myimage.gifEnjoy the Result
Simulating a Zoom Effect
Introduction
Beyond adding static or animated text, ImageMagick also allows you to simulate a camera zoom by resizing and cropping frames progressively. Here's how to do it.
Step 1: Extract Video Frames
user@host:~$ ffmpeg -ss 1:00:20 -t 2 -i /movies/1994.Street.Fighter.720P.x264.AC3.mkv -vf fps=10,scale=320:-1 $filename%05d.pngStep 2: Add Static Text (Optional)
If you'd like your zoom to include a caption (e.g. OF COURSE!), you can apply it to the base frame beforehand. For more details on text overlays, see the section Add text to your GIF.
- First, copy your original frames:
user@host:~$ for i in 000*; do cp "$i" Text_"$i"; done- Then add text to selected frames:
user@host:~$ for i in 0000[7-9]*; do magick "$i" -font Impact -gravity south -pointsize "35" -stroke black -fill white -strokewidth 1 -annotate +0+0 'OF COURSE!' Text_"$i"; doneuser@host:~$ for i in 0001[0-4]*; do magick "$i" -font Impact -gravity south -pointsize "35" -stroke black -fill white -strokewidth 1 -annotate +0+0 'OF COURSE!' Text_"$i"; doneStep 3: Simulate the Zoom
To simulate a zoom effect, we repeatedly resize and crop the same frame. This creates the illusion of a camera zoom-in over multiple frames.
user@host:~$ a=110; b=10; for i in $(seq 20 30); do magick Text_00018.png -resize "$a"% Text_000"$i"_.png; magick Text_000"$i"_.png -gravity center -crop 320x133+$b+0 +repage Text_000"$i".png ;((a+=30)); ((b+=25)); done; rm *_.pngExplanation (Easier to Read)
Text_00018.png: the base frame used as the zoom sourcea=110: initial zoom scale in percentb=10: initial horizontal crop offset (to center the zoom)$(seq 20 30): creates framesText_00020.pngtoText_00030.png((a+=30)): increase the zoom level by 30% per frame((b+=25)): shift the crop window to the right with each steprm *_.png: clean up temporary resized images
a=110
b=10
for i in $(seq 20 30); do
	magick Text_00018.png -resize "$a"% Text_000"$i"_.png
	magick Text_000"$i"_.png -gravity center -crop 320x133+$b+0 +repage Text_000"$i".png
	((a+=30))
	((b+=25))
done
rm *_.png
Make your GIF
user@host:~$ magick -loop 0 Text_*.png myimage.gifEnjoy the Result

Reducing GIF File Size
The file size of your GIF can be important depending on where you plan to publish or share it. For example, if you want to send a GIF via MMS, you’ll often need to keep it under 600 KB while maintaining acceptable quality.
Let’s explore several methods to optimize and reduce the size of your GIF without sacrificing too much visual fidelity.
Baseline: No Compression
This is the result of creating a standard GIF without any optimization:
user@host:~$ ffmpeg -ss 17:05 -t 8 -i /movies/1994.Pulp.Fiction.MULTI.mkv -vf fps=10,scale=320:-1 $filename%05d.pnguser@host:~$ magick -loop 0 00* myimage.gifuser@host:~$ du -sh myimage.gif
2,3M myimage.gif
Using palettegen for Better Compression
This method creates a color palette before encoding, which significantly reduces file size while preserving quality.
user@host:~$ ffmpeg -y -ss 17:05 -t 8 -i /movies/1994.Pulp.Fiction.MULTI.mkv -vf fps=10,scale=320:-1:flags=lanczos,palettegen palette.pnguser@host:~$ ffmpeg -y -ss 17:05 -t 8 -i /movies/1994.Pulp.Fiction.MULTI.mkv -i palette.png -filter_complex "fps=10,scale=320:-1:flags=lanczos[x];[x][1:v]paletteuse" output.gifuser@host:~$ du -sh output.gif
1,7M output.gif
- For more details and advanced usage, see: High quality GIFs with ffmpeg
Using fuzz for Compression
The -fuzz parameter in ImageMagick allows you to compress GIFs by merging similar colors. This is especially effective when the video has little movement or large areas of similar color.
⚠️ Note: Higher fuzz values mean more aggressive compression, but also greater quality loss.
Example: fuzz 2%
user@host:~$ magick myimage.gif -fuzz 2% -layers Optimize result.gif; du -sh result.gifuser@host:~$ du -sh result.gif
1,5M result.gif
Example: fuzz 5%
user@host:~$ magick myimage.gif -fuzz 5% -layers Optimize result.gifuser@host:~$ du -sh result.gif
720K result.gif
Combining fuzz and palettegen for Maximum Compression
For even better results, you can combine palette optimization with color simplification using fuzz. This method maintains quality while significantly reducing file size.
Step 1: Generate a Color Palette
user@host:~$ ffmpeg -y -ss 17:05 -t 8 -i /movies/1994.Pulp.Fiction.MULTI.mkv -vf fps=10,scale=320:-1:flags=lanczos,palettegen palette.pngStep 2: Extract Frames Using the Palette
user@host:~$ ffmpeg -y -ss 17:05 -t 8 -i /movies/1994.Pulp.Fiction.MULTI.mkv -i palette.png -filter_complex "fps=10,scale=320:-1:flags=lanczos[x];[x][1:v]paletteuse" out%05d.pngStep 3: Create the GIF with fuzz 2%
user@host:~$ magick -loop 0 out000* myimage.gifuser@host:~$ magick myimage.gif -fuzz 2% -layers Optimize result.gif; du -sh result.gif
1,1M result.gif
Step 4: Apply fuzz Optimization with fuzz 5%
user@host:~$ magick myimage.gif -fuzz 5% -layers Optimize result.gif; du -sh result.gif
536K    result.gif
Reducing Resolution to Lower File Size
Another effective method to shrink GIF size is to reduce the resolution of the frames. This is especially useful when sharing GIFs on platforms that don’t require high-definition output.
Example: Scale Down to 240 Pixels Wide
user@host:~$ for i in 00*; do magick "$i" -resize 240x Scalled_$i; doneuser@host:~$ magick -loop 0 Scalled_000* myimage.gif; du -sh myimage.gif
1,3M myimage.gif
Dropping Frames + Fuzz Optimization
If file size is a critical concern, you can combine two powerful strategies: dropping frames to reduce the number of images, and applying fuzz optimization to compress the color palette.
Step 1: Generate a Color Palette
user@host:~$ ffmpeg -y -ss 17:05 -t 8 -i /movies/1994.Pulp.Fiction.MULTI.mkv -vf fps=10,scale=320:-1:flags=lanczos,palettegen palette.pngStep 2: Extract Frames Using the Palette
user@host:~$ ffmpeg -y -ss 17:05 -t 8 -i /movies/1994.Pulp.Fiction.MULTI.mkv -i palette.png -filter_complex "fps=10,scale=320:-1:flags=lanczos[x];[x][1:v]paletteuse" out%05d.pngStep 3: Drop Every Other Frame
user@host:~$ magick -delay 22 -loop 0 $(ls out000* | grep -E "*[02468].png") myimage.gif; du -sh myimage.gif
1,1M	myimage.gif
Step 4: Apply fuzz for Final Compression
user@host:~$ magick myimage.gif -fuzz 5% -layers Optimize result.gif; du -sh result.gif
340K	result.gif